Tag: Learning via Terrible Ideas

  • Learning via Terrible Ideas: Replacing Text on Click, Part 2

    Learning via Terrible Ideas: Replacing Text on Click, Part 2

    In Part 1 of Learning via Terrible Ideas, we learned how to:

    • Open the Console
    • Set a variable
    • Add a Click Listener

    But adding a click listener doesn’t make it accessible to people who use a keyboard or different kind of assistive technology.

    To make our example accessible, we’ll need to:

    • Give a “focus indicator” to everything. A focus indicator is the little glowing outline to show you where you are on the page. Press the TAB key now, and you’ll get moved to the next “focusable element.”
    • Make everything that is clickable via a mouse be able to be “clicked” with a Spacebar or Enter keypress.

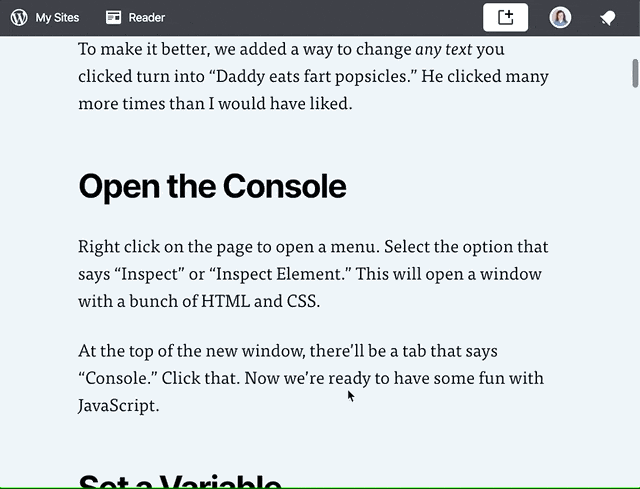
    Making Everything Focusable

    Entering code and tabbing through the elements to show the focus ring moving.

    To make this Terrible Idea™️ accessible, we’ll need to give everything an attribute of tabindex="0". This adds it to the “focus order” which makes it able to be focused.

    Note: It is common for websites to not have any focus indicators. If you TAB through a site and it doesn’t show you where the focus is, then that is Bad.™️

    To give everything a tabindex attribute, we need to:

    1. Get all of the elements on the page.
    2. Loop through each of the elements.
    3. Add the tabindex attribute to each element.

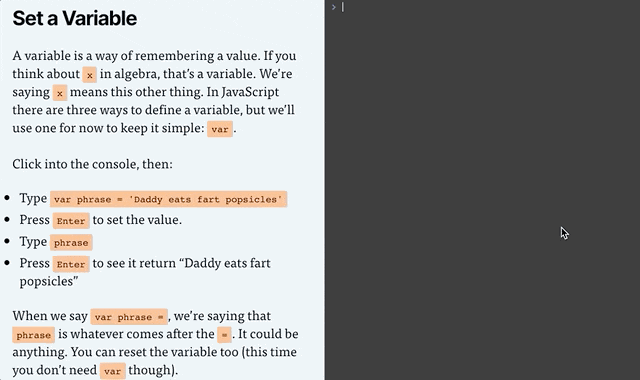
    Open your Console like we did in Part 1 (right click on the page -> Inspect -> Console tab). Now enter these lines in the console:

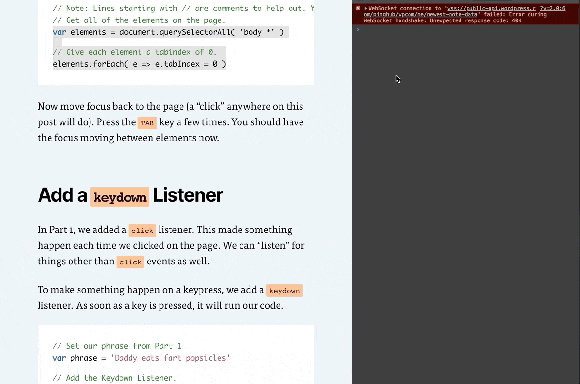
    // Get all of the elements on the page.
    var elements = document.querySelectorAll( 'body *' )
    
    // Give each element a tabindex of 0. 
    elements.forEach( e => e.tabIndex = 0 )
    

    Note: Lines starting with // are comments to help you out. You don’t need to type them. You can, but you don’t need to.

    Now move focus back to the page (a “click” anywhere on this post will do). Press the TAB key a few times. You should have the focus moving between elements now.

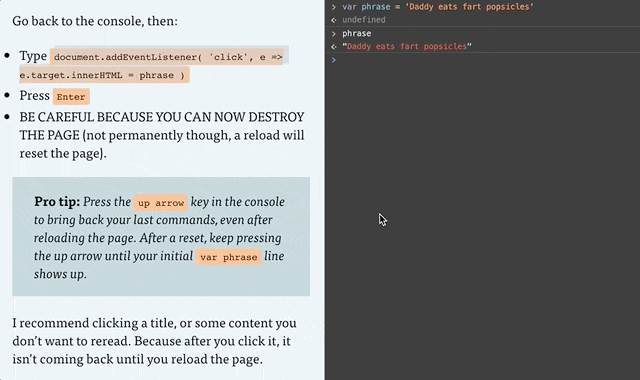
    Add a keydown Listener

    Adding code in the console, then clicking to the page and tabbing to elements. Each keypress changes the focused element's text to "Daddy eats fart popsicles."

    In Part 1, we added a click listener. This made something happen each time we clicked on the page. We can “listen” for things other than click events as well.

    To make something happen on a keypress, we add a keydown listener. As soon as a key is pressed, it will run our code.

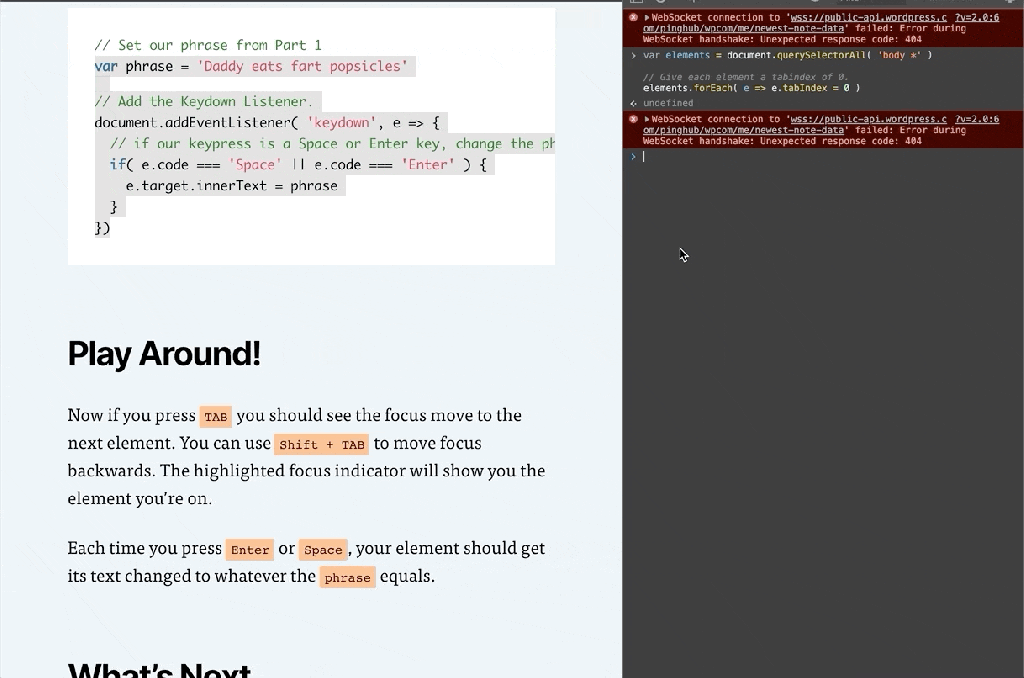
    // Set our phrase from Part 1
    var phrase = 'Daddy eats fart popsicles'
    
    // Add the Keydown Listener.
    document.addEventListener( 'keydown', e => {
      // if our keypress is a Space or Enter key, change the phrase
      if( e.code === 'Space' || e.code === 'Enter' ) {
        e.preventDefault()
        e.target.innerHTML = phrase
      }
    })
    

    Play Around!

    Now if you press TAB you should see the focus move to the next element. You can use Shift + TAB to move focus backwards. The highlighted focus indicator will show you the element you’re on.

    Each time you press Enter or Space, your element should get its text changed to whatever the phrase equals.

    What’s Next

    Part 3 is coming up. We’ll go over two things that bring a ton of power to JavaScript: arrays and functions.

    Be sure to follow me on Twitter or sign up to my email newsletter to find out when Part 3 is finished.

  • Learning via Terrible Ideas: Replacing Text on Click, Part 1

    JavaScript is pretty fun. You don’t need to know much to start playing around with it. Let’s jump in with a Terrible Idea that You Should Never Do.™️

    Note: This article is intended for beginners (and kids!), but has plenty of extra tidbits along the way. I’ll be intentionally glossing over most topics, but give you enough info to be dangerous. Read along, and have fun. 🙂

    Daddy Eats Fart Popsicles

    I asked my son what he’d think was funny to do to my website. He immediately said, “Change that title to ‘Daddy eats fart popsicles.’” So, I opened the Console, and we changed it.

    To make it better, we added a way to change any text you clicked turn into “Daddy eats fart popsicles.” He clicked many more times than I would have liked.

    This article shows you how to recreate this in a few steps.

    Open the Console

    Gif of right clicking on the page to open a menu. Click the "Inspect" option, which opens a side panel of HTML Elements. Click the 
"Console" tab.
    Opening up the Console.

    Right click on the page to open a menu. Select the option that says “Inspect” or “Inspect Element.” This will open a window with a bunch of HTML and CSS.

    At the top of the new window, there’ll be a tab that says “Console.” Click that. Now we’re ready to have some fun with JavaScript.

    Set a Variable

    Gif of clicking into the Console and typing "var phrase = 'Daddy eats fart popsicles'", pressing enter, typing "phrase", and pressing enter again so the console prints "Daddy eats fart popsicles."
    Setting the phrase variable in the console.

    A variable is a way of remembering a value. Remember x in algebra? That’s a variable. We’re saying x means this other thing. In JavaScript there are three ways to define a variable, but we’ll just use one for now: var.

    Click into the console, then:

    • Type or copy/paste var phrase = 'Daddy eats fart popsicles'
    • Press Enter to set the value.
    • Type phrase
    • Press Enter to see it return “Daddy eats fart popsicles”

    If you get red error message after you press enter, something isn’t right. Check to make sure you typed everything exactly like in the example. A common issue is not including both single quotes ' around the text. Finding typos is approximately 75% of being a web developer.

    When we say var phrase =, we’re saying that phrase is whatever comes after the =. It could be anything. You can also change what the variable equals.

    • Because phrase is already defined, we don’t need to type var before phrase. We only need to do that the first time.
    • Type or copy/paste phrase = 'My son eats fart popsicles'
    • Press Enter to set the value.
    • Type phrase
    • Press Enter to see it return “My son eats fart popsicles”

    Clickity, Click

    A webpage is made of a bunch of “elements” that together, form the DOM (I say it like “dawm” or the name “Don” but with an “m” at the end). We’ll make it so any element you click ends up saying whatever phrase equals.

    In my son’s case, he reset it back to phrase = 'My daddy eats fart popsicles' 🙈

    To make something happen when you click, we add an “Event Listener.” An Event Listener waits around for something to happen. It’s like a racer waiting for the signal to go. In our case, the signal is a click.

    Gif of adding the event listener to the console and clicking on the page. Each element clicked gets replaced with the text "Daddy eats fart popsicles"
    Setting the Click Listener

    Go back to the console, then:

    • Type or copy/paste document.addEventListener( 'click', e => e.target.innerHTML = phrase )
    • Press Enter
    • BE CAREFUL BECAUSE YOU CAN NOW DESTROY THE PAGE (not permanently though, a reload will reset the page).

    Pro tip: Press the up arrow key in the console to bring back your last commands, even after reloading the page. After a reset, keep pressing the up arrow until your initial var phrase line shows up. And if nothing is working, reload the page and try again!

    I recommend clicking a title, or some content you don’t want to reread. Because after you click it, it isn’t coming back until you reload the page.

    Event Listener Code, Explained

    Let’s break down document.addEventListener( 'click', e => e.target.innerHTML = phrase ).

    • document: The entire page. The DOM we talked about earlier.
    • document.addEventListener: Add an event listener to the document. We’re adding it to the document, but we could add a click listener to any element of the page.
    • 'click': There are several kinds of event listeners, such as an event when something changes, or when a key is pressed. Our code is saying we want to listen for a click.
    • e => e.target.innerHTML = phrase: e means “event.” We’re getting the target of the event (the target is the element that was clicked) and changing its text to whatever phrase equals.

    Putting it All Together

    If you’re getting stuck or things aren’t working, reload the page, then copy and paste this into the console:

    var phrase = 'Daddy eats fart popsicles'
    
    document.addEventListener( 'click', e => e.target.innerHTML = phrase )
    

    A Mandatory Note on Accessibility

    Accessibility (or a11y) means letting people interact with your website however they want to.

    Maybe that means they have the ability to see and move their arms and hands around. If so, they probably use websites with their eyes to see and a mouse cursor to click on things.

    Some people like using a keyboard and pressing the TAB button and arrow keys to move around the website. Some people use a Screen Reader that will read a webpage to them.

    Either way, it doesn’t matter how a person interacts with your website. That’s for them to decide. But what you need to do is make sure people can interact with your website however they choose to.

    That’s exactly what we’ll learn how to do next time.

    Part 2 is in the Works

    Subscribe to my email list below or follow me on Twitter to find out when I release Learning via Terrible Ideas: Replacing Text on Click, Part 2.