Author: Jerry Jones

  • WordPress Custom Themes vs Pre-made Themes: Which is Right for You?

    WordPress has great appeal because it’s a free, powerful content management system with thousands of pre-made themes to choose from. There’s so much you can do yourself using free or cheap pre-made themes, so when is it time to hire a developer/designer to do custom work for you? When is it better to save money and build it yourself?

    This article will evaluate the good, bad, and the ugly of custom made themes and pre-made themes so that you can decide which is best for you and your business. There’s a time and place for both, and I’ll do my best to give a level-headed, professional opinion on which is best in different scenarios.

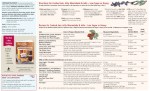
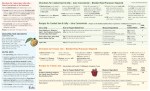
    TL;DR: Custom vs Pre-Made Themes Flowchart

    I think you should read the whole article, but if you want the quick version, use this flowchart to help you make your decision. The rest of the article explains the reasoning behind this chart.

    [rsp_img id=”1684″ class=”theme-flow-chart”]

    Wordpress Custom Theme vs Premade Theme flow chart

    Custom WordPress Themes

    A good custom theme will always be better than the best pre-made theme. It’ll be more lightweight, load faster, and be more reliable. When building a site from scratch, you can tailor all design and code to accomplish your site’s goals.

    For example, a site’s goals could be:

    • People will know within 20 seconds what kind of business we are and who our clients are.
    • We want to build an email list of 1000 people who will become long-term customers within 6 months of launch.

    You don’t need to know your site goals ahead of time. A good designer/developer will help you figure out appropriate goals, and walk you through the process of how you can set, measure, and refine those goals.

    Who Should Use a Custom WordPress Theme?

    A custom site isn’t just about code and design, it’s about accomplishing goals. So, if you answer “yes” to any of these questions, you should seriously consider hiring someone to create a custom theme for you:

    • Is your website going to be your main source of revenue? If your website is heavily tied to your revenue, such as an ecommerce site, you should invest in your business and hire someone who can help you evaluate and implement the best set-up for you. Little details can make a huge impact on your site. Read The $300 Million Button to see what I mean.
    • Is your site going to have complex functionality or structure? For example, are you running a business with multiple locations that each have separate hours, directions, contact info, and employees? Are you starting a restaurant and want to have online ordering, online booking, and a menu that you can easily update daily specials, menu items, sections, and prices?
    • Will your website serve the role of a sales person or secretary? Automating tasks while connecting with customers is great, but it’s easy for these to be ineffective or difficult to manage. Hire someone who can design solutions that will work for you.
    • Will a great website give you a competitive advantage? Make it worth your customers’ time and yours by investing in a custom site. Websites aren’t checkboxes on the business list. If they’re not serving a purpose, it’s not worth the money.
    • Will your site have thousands of visitors per day? You’ll need to highly prioritize performance, or you’ll end up with a slowly loading site and lots of server crashes.

    Pros of Custom WordPress Themes

    • Tailored exactly to your needs.
    • Lightweight code.
    • More stable. Less moving parts means less variables that can break your site.
    • Site goals lead the design Rather than trying to retrofit a design to meet your goals.
    • Unique design. No site will look exactly like yours.
    • Future-proof. If coded well, you should be able to easily move to a new design in the future.
    • Experienced web designer. You get the expertise of the person designing and building your site to guide you through the process and help you avoid common, costly mistakes.
    • Saves time. You don’t have to build and design your site yourself.
    • Easier to manage complex tasks. For example, with the restaurant example above, a good developer can build a custom plugin that will allow you to easily enter your menu items, price them, rearrange them, etc.
    • Accessible for people with visual disabilities. Accessible sites are made by designer/developers who prioritize it. MANY websites are not friendly for screen reader programs. It’s not overly difficult to do, but oftentimes it’s not prioritized.

    Cons of Custom WordPress Themes

    • Expensive. For even the most basic site, plan to budget at least $2000 for an experienced designer and developer. This is not a hard and fast rule. Pricing is all over the place, so you may be able to find someone for cheaper. At the same time, don’t be surprised if an experienced designer/developer’s starting rate is $5000 or more.
    • Highly dependent on hiring the right person/firm. It’s hard to find someone with experience when there’s so much to understand when creating a website. How do you evaluate someone’s code when you don’t code? Make sure they’re honest and can point to specific goals they’ve accomplished for their clients. Test their sites on your phone, tablet, and desktop computer. See if they really work how they say they do.

    Pre-Made WordPress Themes

    Pre-made WordPress themes give a low barrier of entry to a website. It’s cheap, easy (sometimes), and allows you the satisfaction of building a website yourself. Before we go into the pros and cons of pre-made WordPress themes, it’s good to take a look at the main goals of companies and designer/developers who make WordPress themes:

    • Built for customization. When building a pre-made theme, the more adaptable it is, the more people you can sell it to. This means bloat. It’s like buying a toolbox when you only need the screwdriver.
    • Give tons of options. You’re not going to see any themes that promote themselves as “Totally Inflexible! Only One Font Choice and Color Palette! Limited Options!” But, in the end, you don’t need 400 fonts on your website, you only need one or two.

    This does not mean that pre-made themes are inherently bad. Pre-made themes serve a wonderful role by offering decent sites that can be set-up by people who don’t code. That’s a great thing. You just need to keep in mind what goals pre-made themes are trying to accomplish, and weigh the pros and cons to see if it fits your needs well.

    Who Should Use a Pre-Made WordPress Theme?

    A well-made custom WordPress theme is always going to be more lightweight and faster than a pre-made WordPress theme, and a Corvette is always going to be faster than a Prius. That doesn’t mean there isn’t a place for both. If you answer “yes” to these questions, a pre-made theme may be a better choice for you:

    • Do you have a budget of less than $2000? This is a rule of thumb. You can find people for cheaper because experience is varied.
    • Is your website just an informational “business card” site? If you won’t be making money off of your site or attracting a substantial amount of new customers from it, save your money.
    • Are your competitors’ sites poorly made? For example, if you’re a plumber, and all plumbers’ sites in your area are awful, then you probably don’t need much in order to be the cream of the crop in your market. Spend your marketing budget on a good Search Engine Optimization (SEO) person instead.
    • Is your site personal? If it’s just your personal blog, save your money and buy a pre-made theme that you like the design of and that works well.

    Pros of Pre-Made WordPress Themes

    • Cheap. Pre-made themes range from $0 to $150. High price does not necessarily mean quality though.
    • Lots of Options. You can easily select your own color palette and font choices.
    • You don’t need to know how to code. You might have to copy/paste complex shortcodes that are difficult to understand, but you don’t need to know any programming languages.
    • You can see the outcome. When you hire a custom designer/developer, you’re paying them before you actually see what they make for you. A good designer/developer will always make sure you’re happy with the outcome and explain why design decisions were made and what their impact is. With pre-made themes, what you see is what you get.
    • Satisfaction. It’s empowering to completely control your website and get it set-up on your own. If you’re someone who isn’t scared of learning new things and loves problem solving, you may have a great time learning the ins and outs of your WordPress site.

    Cons of Pre-Made WordPress Themes

    • Beware of switching themes in the future. Most of the time, pre-made themes heavily rely on shortcodes and custom fields. If you ever change themes, be prepared to start from scratch.
    • Difficult to set-up. Sure, you can display a page with a custom format, responsive grids, and a slider; but be prepared for a steep learning curve even if no code is involved.
    • Bloated. Offering tons of options goes hand-in-hand with bloat and sluggish sites.
    • Difficult to fix. As someone who makes websites for a living, anytime I’m hired to fix or add something to a pre-made theme, it takes me twice as long because pre-made themes are offering so many features and options. Every change you make, you have to check that you didn’t unintentionally break something else, and in pre-made themes, there’s a lot more to check.

    How to Evaluate Pre-Made WordPress Themes

    If a pre-made WordPress theme is right for you, how do you decide which one is best?

    • Test it. If it says it’s responsive, resize your browser and see how it handles it. Do things restack and reorganize well? Does the menu work well on an iPhone? If the theme demo site doesn’t work well, don’t expect your site to work well.
    • Run a speed test. Does it say it’s lightweight? Go to Pingdom’s Website Speed Test and enter the theme’s demo site URL. If the demo site has more than 40 http requests, it’s not lightweight. I tested a few pre-made themes, some of which said they were lightweight, and generally got anywhere from 80 – 130 requests. My website is run on WordPress, and the custom base theme I made only has 11 requests. Pre-made themes on the Genesis framework were by far the best, but I didn’t test that many.
    • Does it use scroll hijacking? Scroll hijacking is when you scroll the website, and the website changes your scroll speed, or doesn’t allow you to scroll how you normally do. I’m extremely biased against scroll hijacking for many reasons. When I see a theme that implements it by default without a specific, good reason, I skip it. There are so many themes out there, that a litmus test like this for quickly evaluating themes is helpful.

    What if Custom Themes and Pre-Made Themes Sound Right for You?

    If you answered “yes” to a lot of the questions on both the custom theme and pre-made theme sections, then hiring a consultant to install a pre-made theme might be right for you.

    For example, say you’re a small business who needs a website, and you have $800 budget to get everything built. You don’t have time to build it yourself, and you don’t have the budget or need for a custom website. A great option is hiring someone to implement a pre-made theme for you. The consultant you hire can help you decide on your site’s goals and pick a theme that will be best for your needs.

    There’s No 100% Right Answer

    Each business and site has different needs and goals. You might decide a custom theme is right for you, but you run across a pre-made theme that perfectly fits everything you need. Or, you may think a pre-made theme is right for you, and end up running into lots of problems. Lots can happen.

    Get the information you need to make the right decision, and do what’s best for you. Don’t feel bad or let people judge you for not making the “perfect” site.

    I’ve tried to be unbiased in this review, and I’m open to feedback. Think I’m wrong? Have more questions? Leave a comment and let me know.

    If you need to develop a custom theme, let’s get in touch.

  • Why Pixel Perfect Responsive Design is Wrong

    I’ve been reading over job postings for front-end developers and designers, and a lot them have a phrase like “You should love coding pixel perfect responsive designs”. Those jobs instantly go to my “no” pile.

    Responsive design means letting go of the idea of a pixel perfect design. Responsive designs need to adapt to any device thrown at them. You have to embrace the beauty of how malleable your design is. Let people access it how they want to access it.

    This doesn’t mean you should totally disregard mock-ups (unless you’re in with the cool kids who design in the browser). By all means, do a mock-up for each breakpoint, but don’t expect pixel perfect accuracy. A good responsive design emphasizes consistent ratios, and is coded with percentages and em values. Let your design stretch and shrink. Design for adaptability and accessibility.

    This is what makes design fun to me. Thinking about all the possible ways someone could access a website, and trying to provide a simple design and codebase that addresses all the project’s goals while being accessible to all users. That’s more relevant and exciting than holding “pixel perfect” as the goal.

    So, if you want to work with me (which, if you do, please get in touch), don’t put anything about being “pixel perfect” in your job description. That is, unless you create a breakpoint mock-up for every pixel from 50 to 5000. But, then again, if you do that, I still wouldn’t work for you.

  • Using Picturefill Responsive Images with the WordPress Editor

    Folks, we’ve got an image bloat problem. But, it’s OK. We can fix it.

    When someone on an iPhone with a 320px wide screen on a 3G network arrives at your fancy-schmancy WordPress blog, they don’t need a 1020px wide image. They need an image that’s 320px wide. Each image you load that’s more than 320px wide compounds their slow load time.

    Sure, we could use techniques like lazy loading images to make the time to “first-load” of content a little more bearable, but how about we go to the root of the problem? Not sending people images that are larger than they need.

    Enter srcset and sizes!

    New specs for responsive images (not just images that squish and stretch), but providing images for your user’s screen size and resolution. If you don’t know anything about that and why letting the browser choose which image is best to serve up to your user, read Eric Portis’ amazing & fun post about srcset & sizes.

    Awesome, right?! Now let’s sit back and enjoy us some cute cat videos.

    …but, if you’re using WordPress, adding images with WordPress’s default “Add Media” button doesn’t generate future-proof code using the srcset and sizes attributes.

    *Sad trumpet* Waaaah, waaaaaaaaah.

    Polyfill Srcset & Sizes

    First, we need a polyfill to support srcset & sizes on old browsers. Fortunately, for us, Scott Jehl at Filament Group helped make Picturefill so we could start using responsible web design today.

    Install that on your site and come back to finish this up. This article will still be here.

    Don’t Write that href, Shortcode It!

    I love pure code. If I have to use a shortcode, I grumble a little, but know that it’s saving me a ton of time. But when I have to write HTML into the WordPress post, I get annoyed, because if I have to make changes to it in the future, I know it’ll be difficult. When WordPress generates images, it looks like something like this:

    
    <img class="alignleft wp-image-382" 
    src="skateboarding-dog-1020x612.jpg" 
    alt="Dog wearing sunglasses skateboarding a huge vert ramp" 
    width="1020" height="612" />


    So, even if you don’t want to use srscet and sizes on your images, what happens when you want to move over to use them in the future? That’s a lot o’ MySQL queries, my friend. Lots of search and replace and hoping you caught everything. I’d rather write a shortcode that’ll pass on the variables I need to generate responsive image code. Then, if (or when) I need to change it, I just have to update the shortcode function, not the database entries.

    So, how’s this for a shortcode?

    
    [rsp_img id="332"]


    Look good? Alright! Give it the Attachment (image) ID, and it generates this code on your site:

    
    <img class="post-img align-none size-large"
    sizes="100vw"
    srcset="/img/radical-skateboarding-dog-1020x612.jpg 1020w,
            /img/radical-skateboarding-dog-640x384.jpg 640w,
            /img/radical-skateboarding-dog-480x288.jpg 480w,
            /img/radical-skateboarding-dog-320x192.jpg 320w,
            /img/radical-skateboarding-dog-150x90.jpg 150w"
    alt="Dog wearing sunglasses skateboarding a huge vert ramp"/>


    Not the prettiest to read… but, it is to spec. That list of srcset images lets the browser pick the one that’ll fit best for your user’s screen.

    There’s a few options we can pass to it too:

    • id– the attachment ID, as mentioned earlier.
    • alignment– left, right, or center.
    • size– thumbnail, medium, or large.

    So, when you enter a shortcode into your editor with all the options, it might look something like this:

    
    [rsp_img id="332" alignment="center" size="large"]


    Here Comes the PHP – Adding Image Sizes

    First off, we need to register our image sizes so when a new image gets uploaded, all the right sized images get created. These are the sizes I use on this blog.

    
    add_image_size('rsp_img_xl', 1020);
    add_image_size('rsp_img_large', 640);
    add_image_size('rsp_img_medium', 480);
    add_image_size('rsp_img_small', 320);
    add_image_size('rsp_img_tiny', 150);


    I suggest setting “large” to be the full width of your content area on a desktop / laptop. Then, have one size that’s twice as large for retina versions of those desktops.

    Hijack the Add Media Output

    When a user adds an image to their post with the “Add Media” button, we want it to insert our rsp_img shortcode, not the img HTML. So, we need to add a filter to grab the submission and send our shortcode instead of the default HTML. Here’s how we’ll do that:

    
    function insert_rsp_img_shortcode($html, $id, $caption, $title, $align, $url, $size) {
        // build the align attribute
        $img_align = (!empty($align) ? ' align="'.$align.'"' : '');
        // build the size attribute
        $img_size = (!empty($size) ? ' size="'.$size.'"' : '');
        // generate the shortcode with id attribute
        $rsp_img_shortcode = '[rsp_img id="'.$id.'"'.$img_align.$img_size.']';
        // send the shortcode to the editor
        return $rsp_img_shortcode;
    }
    add_filter( 'image_send_to_editor', 'insert_rsp_img_shortcode', 10, 9 );


    Now the shortcode gets output to the editor when you add media to the post. Awesome! But… we still need to build the functionality…

    Run the rsp_img Shortcode

    Here’s the full functionality of the rsp_img shortcode. It’s commented like crazy to make it as easy as possible for you to follow along with what is happening. Hack away at it, or just copy / paste it into your functions.php file along with the insert_rsp_img_shortcode function and add_image_sizes code.

    
    // what should the shortcode do?
    function rsp_img_shortcode( $atts ) {
        // get our attributes from the shortcode
        extract(shortcode_atts(array(
            'align' => '',
            'id' =>'',
            'size' => '',
        ), $atts));
    
    
        // get all of our image sizes that we set above with add_image_size() earlier
        $img_retina = wp_get_attachment_image_src( $id, 'rsp_img_xl' );
        $img_lrg = wp_get_attachment_image_src( $id, 'rsp_img_large' );
        $img_med = wp_get_attachment_image_src( $id, 'rsp_img_medium' );
        $img_small = wp_get_attachment_image_src( $id, 'rsp_img_small' );
        $img_tiny = wp_get_attachment_image_src( $id, 'rsp_img_tiny' );
    
        // get the alt text
        $alt_text = get_post_meta($id , '_wp_attachment_image_alt', true);
    
        // get the image caption
        $attachment = get_post( $id );
        $caption = $attachment->post_excerpt;
    
        // if they want medium or small, we'll add some media queries to serve up the right images by the viewport
        // we don't actually need to change the srcset, just the sizes attribute because we're letting the browser pick the image size
        if($size === 'thumbnail') :
            // I'm making some generalizations here to deliver the right size image
            // Thumbnail doesn't mean 150x150 here, it means 'smaller than medium but appropriately sized to the screen'
            // So, thumbnail to me means:
            // 1/4 of viewport for desktop
            // 1/3 of viewport for tablets
            // 1/2 of viewport for mobile devices
            // full width if less than that
            $img_sizes = '(min-width: 48em) 25vw
                          (min-width: 34em) 33vw,
                          (min-width: 24em) 50vw,
                          100vw';
        elseif($size === 'medium') :
            // 1/2 of viewport for desktops and tablets, full width otherwise
            $img_sizes = '(min-width: 34em) 50vw,
                          100vw';
        else :
            // if you don't specify a size, or it's something other than 'thumbnail' or 'medium',
            // we're passing you the full viewport size img, dawg
            $img_sizes = '100vw';
        endif;
    
    
        // generate the html of the image. we're adding our classes, and, if there's no caption,
        // we're adding a post-img-no-caption class for styling
        $rsp_img_html = '<img class="post-img'.(!empty($align) ? ' align-'.$align : '').(!empty($size) ? ' size-'.$size : '').(empty($caption) ? ' post-img-no-caption' : '').'"
                            sizes="'.$img_sizes.'"
                            srcset="'.$img_retina[0].' '.$img_retina[1].'w,'.
                                    $img_lrg[0].' '.$img_lrg[1].'w,'.
                                    $img_med[0].' '.$img_med[1].'w,'.
                                    $img_small[0].' '.$img_small[1].'w,'.
                                    $img_tiny[0].' '.$img_tiny[1].'w"
                            alt="'.$alt_text.'"/>';
        if(!empty($caption)) :
            // ooo! We have a caption! We should wrap that image in a figure element so we can use
            // appropriate HTML5 syntax and put the caption in a figcaption element
            $rsp_fig = '<figure class="post-figure'.(!empty($align) ? ' align-'.$align : '').(!empty($size) ? ' size-'.$size : '').'">'
                            .$rsp_img_html
                            .'<figcaption class="post-figcaption">'
                                .$caption
                            .'</figcaption>
                        </figure>';
        else :
            // no caption. let's just output the straightup img html we made earlier
            $rsp_fig = $rsp_img_html;
        endif;
    
        // send on the html we generated to the page
        return $rsp_fig;
    }
    add_shortcode('rsp_img', 'rsp_img_shortcode');


    Style the Image & Caption

    We have our code running great, but it’s unstyled. Here’s the basic CSS to get it all wrapped up nice. Adjust to fit your style, and you’ll be good to go! I’m using Sass, but you can extract it to CSS too if you don’t have a Sass workflow. It’s marked up with comments to show you what’s happening and why.

    
    .post-figure {
        background: #f5f2f0;
        border-bottom: 4px solid #ddd;
        margin-bottom: 1.6em;
        max-width: 100%;
    
        .post-img {
            border: 1px solid #f5f2f0;
            display: block;
            margin: auto 0;
            width: 100%;
        }
    
        .post-figcaption {
            font-size: .85em;
            padding: 1.3em 1.3em 1em;
            color: #787A7E;
            margin-bottom: 0;
        }
    }
    
    
    .post-figure,
    .post-img-no-caption {
        margin-bottom: 2em;
        // we only need to apply this to the image if there's no figure
        // wrapped around it (like when there's no caption)
        width: 100%; // we're assuming a 100% width for a fallback if no size is specified, then overwriting if needed
    
        &.align-none,
        &.align-center {
            // we're treating these as the same. center it.
            display: block;
            margin-right: auto;
            margin-left: auto;
        }
    
        // floats
        &.align-right {
            float: right;
            margin-left: 2em;
        }
    
        &.align-left {
            float: left;
            margin-right: 2em;
        }
    
        // sizes
        // these all match our "sizes" attribute in our [rsp_img] shortcode
        &.size-thumbnail {
            width: 100%;
    
            @media screen and (min-width: 24em) {
                width: 50%;
            }
    
            @media screen and (min-width: 34em) {
                width: 33%;
            }
    
            @media screen and (min-width: 48em) {
                width: 25%;
            }
        }
    
        &.size-medium {
            width: 100%;
    
            @media screen and (min-width: 34em) {
                width: 50%;
            }
    
            @media screen and (min-width: 48em) {
                width: 30%;
            }
        }
    
    }


    What’s Next for Responsive Images?

    I’m not sure! That’s why I wanted to use a shortcode, to make sure I could adjust as specs change.

    Have any ideas on how to improve this? See any oversights in my set-up? Let me know on twitter or in the comments below.

  • Accessible Web Design Pull Quotes

    Accessible Web Design Pull Quotes

    Pull quotes are a great way for articles to pull readers in with your swanky text, reflect traditional print design, and show off your highfalutin typography skills. And, let’s be honest, it just looks so nice. If you don’t think so, you’re probably not reading this article.

    What the pull quote looks like on desktop.

    You’ll need to be OK with HTML and CSS to make this happen. Or, if you’re using WordPress, you can plop the shortcode at the end of the article in your functions.php theme file.

    HTML & Accessibility

    Pull quotes are great for print articles. You’re flipping through a magazine and it’s a way to draw you in, help you decide which articles to spend your time reading. On a website, it’s a stylistic flourish, and a way to entice your reader to actually finish the article you wrote.

    The downside with a pull quote on a website, is that you’re repeating content. What about users who have a visual disability and are using a screen reader to access your article? They’re going to have that content read to them twice, and, since there’s no cue for them that it’s just stylistic, it’ll be inserted in the article in a random place and not really make sense. Not good! Fortunately, we can fix it.

    <div class="pull-quote" role="presentation" aria-hidden="true">
        This is my awesome pull quote. It has the power to draw you in to the article, like a mystical wildebeest.
    </div>
    

    See that role=”presentation” and aria-hidden=”true” stuff? It tells screen readers to skip over that content so it’s not read to them twice. We want our pull quotes to enhance our user’s experience, not annoy them. If you want to learn more about those tags, here’s a great post about aria-hidden implementation across screen readers and browsers.

    CSS

    All the CSS I do is of the mobile-first / progressive enhancement philosophy. That means I want our base experience to be great, and for those that have additional options (like a larger screens and javascript), they get an even better experience. Here’s the CSS to draw the pull quotes out of the article and have the text wrap nicely around it.

    /* mobile-first design css */
    .pull-quote {
        border-top: 2px solid #ddd;
        border-bottom: 2px solid #ddd;
        color: #486B76;
        font-size: 1.3em;
        margin: 1em auto;
        padding: 1em 0 1em 0;
    }
    
    /* tablet styles */
    @media screen and (min-width: 34em) {
        .pull-quote {
            float: left;
            width: 50%;
            padding: 1.2em 0 1.2em 0;
            margin: .8em 2em .8em 0;
        }
    }
       
    /* desktop styles */
    @media screen and (min-width: 58em) {
        .pull-quote {
            margin-left: -20%;
        }
    }
    

    Drop that in your CSS file and tweak to your heart’s desire. I use ems for everything to keep spacings all balanced with the typography and user’s browser zoom. It’s awesome.

    There you go! Your style and HTML is there. Pretty easy. Oh, but you want to use a shortcode with WordPress instead? I do too, because marking up HTML in a WordPress post is annoying.

    Bonus WordPress Shortcode

    If you have the CSS set-up already, drop this into the functions.php of your theme file. Don’t do this on a live site or via WordPress’s internal theme editor. Well, you can, but be warned that you might break your entire site.

    function pull_quote_shortcode( $atts ) {
        extract(shortcode_atts(array(
            'quote' => '',
        ), $atts));
        return ''.$quote.'';
    }
    add_shortcode('pull_quote', 'pull_quote_shortcode');
    
    // usage 
    // [pull_quote quote="Hey, Look! A pull quote!"]
    

    That’s it! Well… you might have to adjust your site layout. Single column articles without any sidebars work best (like on this site). After you do that, put a pull quote up on your site, lean back in your chair, and think, “Oh, yeah. That pull quote looks better than an expertly executed triple gainer.”

    Just kidding, nothing is better than that.

  • Create Your Own Crowdfunding Site

    Create Your Own Crowdfunding Site

    I’ve had the honor of working with a team to design and be the front-end developer/UX designer for the best way to create your own crowdfunding site.  Users can have a fully functioning crowdfunding site up and running in two minutes, all without touching a line of code.  CrowdfundHQ was developed entirely from scratch without using any code libraries (a very rare occurrence these days), coded with Sinatra, MongoDB, CSS, Javascript, and HAML/HTML.

    CrowdfundHQ boasts a large feature list for their crowdfunding sites.  Here’s a few:

    • Unlimited Hosting
    • Customize your CSS
    • Use pre-built layouts to design your site
    • Add Pages
    • Add Categories
    • Logins using Facebook/Google
    • Extremely robust admin panel for managing campaigns and users
    • Multiple Crowdfunding Sites
    • Great price of only $79/month (one of the lowest in the industry)
    • Free 14 day trials
    • Lots more!

    Go to CrowdfundHQ to see how robust, fast, and easy it is to start your own crowdfunding site.

  • Pomona Pectin Directions

    Pomona Pectin Directions

    My largest print order to date has been completed successfully! Pomona Pectin, a fantastic small company with a internationally distributed low/no sugar pectin, wanted me to convert their current design into Adobe inDesign format for future easy updates, and add color to the layout for a print run of over 200,000 prints. The design scope was to keep it similar and familiar, but add color and draw attention and highlight certain elements to improve customer understanding of how to use the pectin, and subsequently reduce the number of calls they received on how to use the pectin.

    Here are the images, the new version first that I worked with Pomona Pectin on revising and updating, followed by the old design.

  • Takamine FP350SMC-SB

    Up for sale is my Takamine FP350SMC-SB. It’s been an incredible guitar with great tone and playability. It’s been loved and broken in over the last 9 years. I never intended to sell this guitar, but I’ve realized that I’m just better suited for a smaller bodied acoustic guitar. Contact me if you’re interested in buying it. Asking for $500-580, whatever the best offer is.

  • This Site is Responsive

    There are still a few bugs to iron out and it’s only been tested for iPad and Chrome, but this site is now fully responsive for all screen sizes. If you’re on a desktop, go ahead and resize that browser window and watch the magic happen.

  • Triangle Brain Teaser

    Triangle Brain Teaser

    UPDATE on 10/31/2012– My answer is wrong. Eagle-eye commenters found two more triangles to add to my answer, which are pointed out in the comments, and below the gallery in the UPDATE sections.


    I came across a brain teaser on Facebook that a friend had commented on, and I’m pretty much going to get obsessed with any brain teaser, so I had to give it a shot (or 3).

    It went like this.

    How Many Triangles are in the Picture Below?

    I counted it at first and was sure I missed some, so I went back and tried it again and found a few more. Then, on my third try, I found what I believe is all of them. I checked a few more times and it’s all I can find.

    Then, the poster of the facebook question displayed the answer to everyone as one less than what I had come up with. So, it bothered me enough that I decided to completely waste my time putting this together. The gallery shows how I found my answer.

    UPDATE on 10/10/2012– Faruk pointed out in the comments I missed one more triangle. You combine 19+20+21+26.

    UPDATE on 10/31/2012– Mr.Chinchie found another one! You combine 13+24+25+26+27+28. So the current answer is now 41 triangles. If anyone finds another, let me know!